How can I customize the functionality of the Oracle B2C Service Console?
Oracle B2C Service console handles both agent activities and administrative functions.
From the Oracle B2C Service console, staff can work on incidents, answers, campaigns, sales quotes, opportunities, surveys, contacts, organizations, and reports and also administration functions based on the permissions in their profile.
Site administrators can configure and customize the features and functionality of the console by selecting one of the configuration buttons in the Navigation pane. This includes, but is not limited to the following types of activities:
- Adding staff accounts and profiles
- Defining custom fields
- Adding products and categories
- Configuring rules
- Editing configuration settings and message bases
- Editing files in the File Manager
Customizing the Navigation Pane
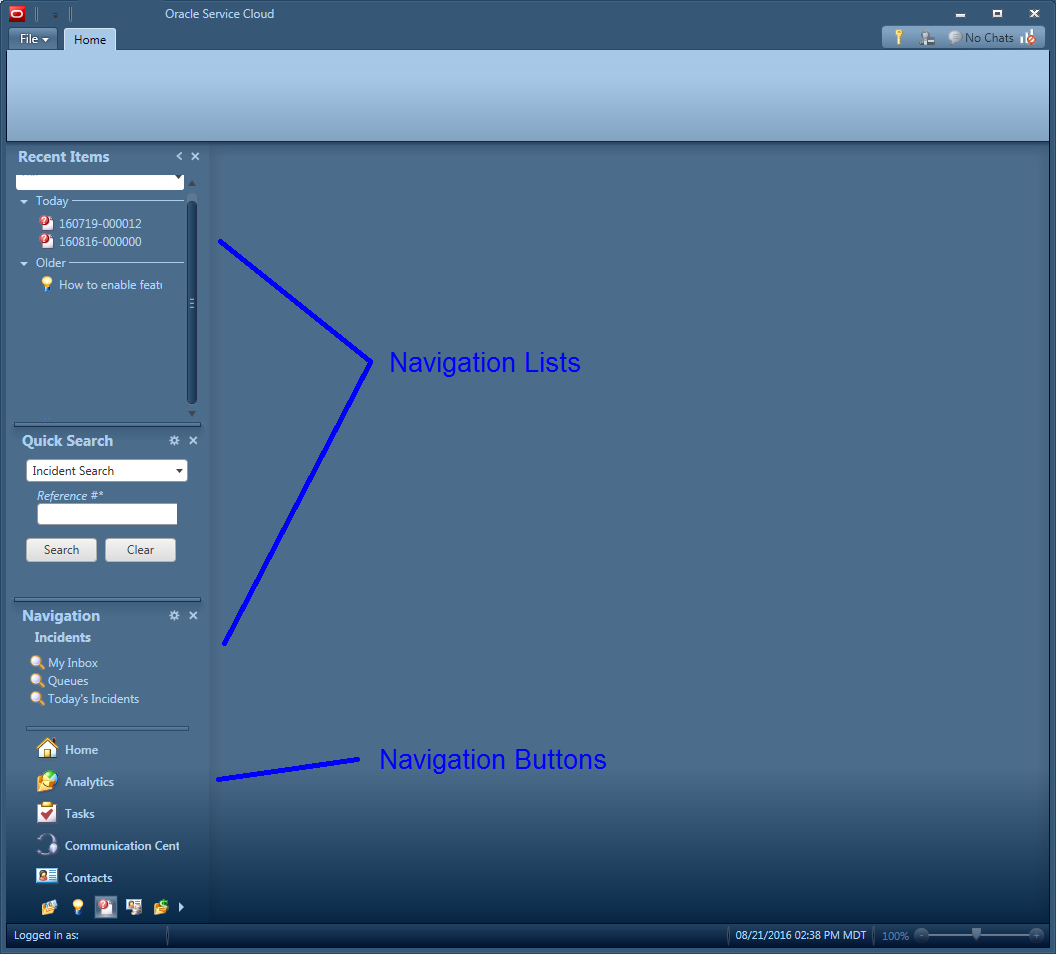
The navigation pane on the left side of the console is defined by a navigation set that is assigned to a staff member via their staff profile. The navigation set defines which buttons are listed -- for example, Answers, Incidents, Contacts, and Surveys -- and which reports display for each button.
Within the console, staff can affect the navigation pane in the following ways:
Collapse or expand the navigation pane: Staff can collapse the navigation pane by clicking the << arrows at the top of the pane and expand the pane by clicking >>.
Customizing the navigation pane options: All staff members can customize the order of the navigation buttons and disable specific buttons -- even if their staff profile does not have the Customize Navigation Set box enabled. Staff can also specify the order of the Quick Search, Recent Items and report list within the navigation pane.
To customize the navigation pane, select File at the top left of the console, click Options > Navigation Pane. After modifying your preferences, click OK to save your changes.
- To re-order the navigation buttons, Check the boxes of the Navigation items you want in the list and click Move Up or Move Down to move a specific item.
- To re-order the sections when a navigation button is selected, highlight the navigation button. Then, highlight the Quick Search, Recent Items, or the Button Items in the second field and click Move Up or Move Down.
- To reset the navigation pane, click Reset, to reset any changes you have made since you opened the RightNow CX Options window. Click Reset Navigation Set to Profile Default to reset to the profile default, any reports you have added to the Navigation set will be removed.
- To open records with a single click, clear the check box next to Double Click to Open Items
- Set the field to indicate the number of Recent Items to display. The default is 10 items, maximum is 20.
- Select the action to execute at Startup. When you first log in, the navigation button defaults to the navigation item for the current page.
Nothing: no report opens when you log in
Default Navigation Item for current page: Opens the default report for the last navigation button you had selected when you last logged out.
Last Navigation Item opened in previous session: Opens the last report that you opened when you were last logged in.
Customizing reports listed for each navigation button: Staff can only customize the list of reports for each navigation button if their staff profile has the Customize Navigation Set box enabled under the Interfaces options, above the listing of navigation sets for each interface.
If staff have the ability to customize their reports in the navigation set, they have a Customize List... link/icon in each of the list areas.
To modify the list of reports:
- Click on the Customize List... link/icon.
- From the pop-up window, find the report you want in your Navigation list items the Available Items list on the left.
- Drag the report to your navigation list item to the pane on the right. You can also move the item up or down in the list.
- Click OK.
Customizing the Content Pane
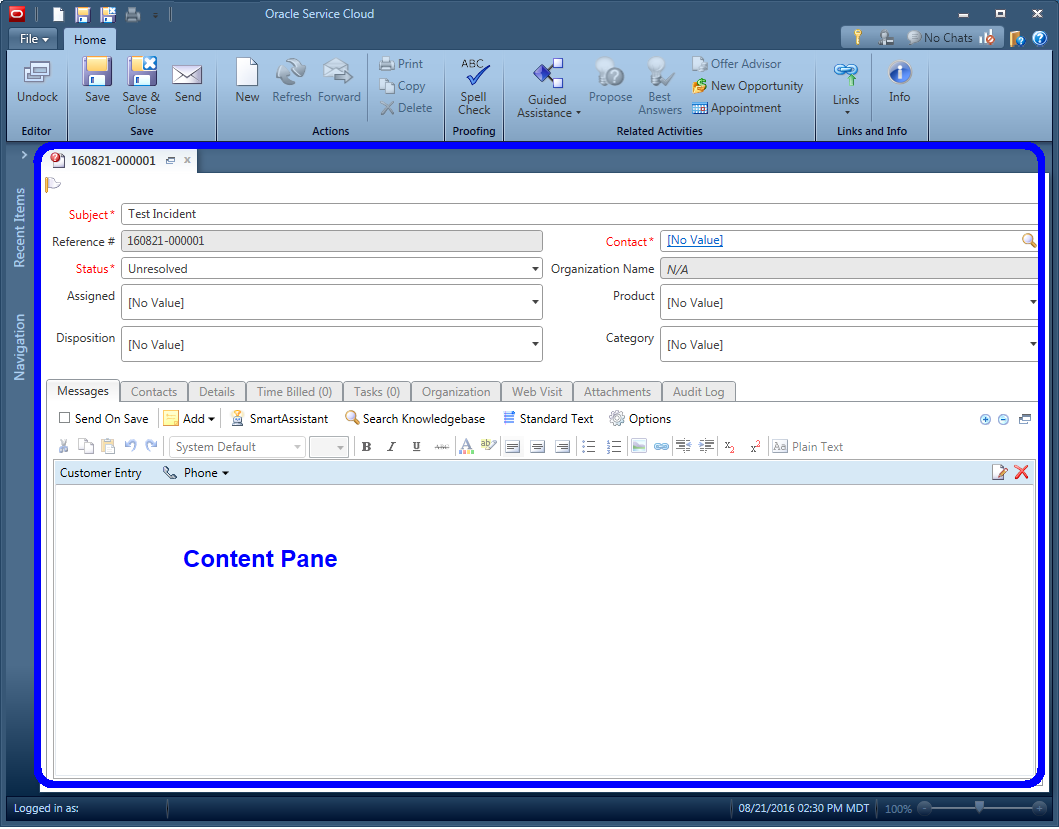
The content pane is where reports and records display. Staff can customize the functionality of the content pane in the following ways: go to File at the top left of the console, click Options > View Options. Select the appropriate option(s):
- Split Window: With the split window, a report can be opened in the top section of the pane. When a record is opened from the report, the record opens in the lower section of the pane.
- Display Content Editors in Popup Windows: When enabled, when you open a record, the record opens in a separate window. You can dock the window to the console after it opens.
- Display Content Editors in Scrolling Mode: When enabled, records open in a single page with each tab listed sequentially. Users must scroll vertically to access information on the different tabs defined in the workspace.
- Tab Alignment: By default, reports and records open with a separate tab that displays along the top of the pane. You can have the tabs display on bottom of the pane by modifying the tab alignment.
Customizing tab order in a workspace: When a record is open, the initial order of the tabs in the workspace is defined by the workspace itself. Staff can drag and drop tabs to reorder them within the record. Subsequent records that are opened use the reordered sequence of tabs.
For example, when viewing an incident, the default order of the first four tabs is: Messages, Contacts, Details, Time Billed.
If the staff member drags and drops the Details tab to be second in the order, when they open subsequent incidents, the Details tab will be in the second position.

